
Crooked cabinet doors can make even a clean kitchen look messy. The good news is you don’t need to call a professional for every small fix. A kitchen cabinet remodel doesn’t always mean ripping everything out and starting over; sometimes, a few turns of a screwdriver is all it takes. This guide walks you through checking door alignment, adjusting hinges, and testing movement to get your cabinets looking right again. With basic tools and a little patience, you can handle these adjustments yourself in under an hour.
Assess Door Alignment
Start by looking at the gaps between your cabinet doors and the frame. Properly aligned doors should have even spacing around them. Check if the doors sit level with each other by placing a spirit level across the top edges. If they’re off, you’ll need to make some adjustments. Also, make sure the doors open and close without rubbing against each other or the frame. Good alignment makes your kitchen look better and keeps everything functioning the way it should.
Tighten or Loosen Screws
Grab a screwdriver and find the screws on the hinges that connect the door to the cabinet frame. Make sure they’re snug but not cranked down too tight. If a door looks crooked, try loosening the screws a bit to give yourself room to shift things around. Make small turns and test the door after each one. Sagging doors often just need the screws tightened to pull them back up. If the door sits too high or low, loosen the screws, reposition the door, then tighten them again. Small tweaks here can fix most alignment issues.
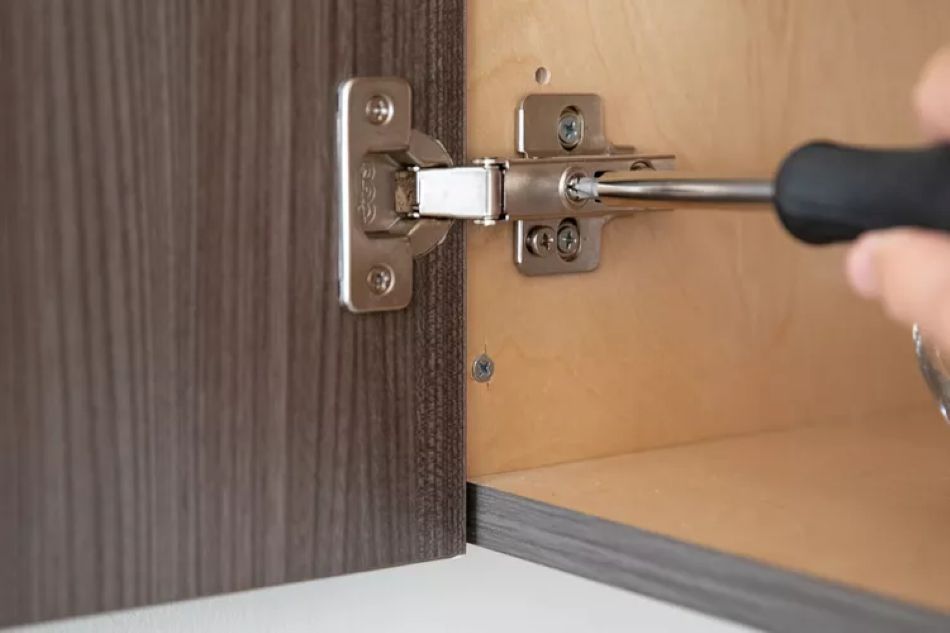
Adjust Hinges
Take a close look at your hinges for any signs of wear, loose screws, bent metal, or misaligned parts. If the door won’t close properly or hangs crooked, the hinges probably need some attention. Use your screwdriver to loosen or tighten the hinge screws as needed. Don’t crank them too tight or the door might stick or end up worse than before. After adjusting, open and close the door a few times to see how it moves. Well-adjusted hinges keep your cabinet doors working smoothly and looking clean.
Use a Screwdriver
A screwdriver is your main tool for this job. Figure out what type you need; usually, a Phillips head or flat-head will do the trick. Turning the screws clockwise tightens the hinge and lifts the door. Counterclockwise loosens it and lets the door drop. Make small adjustments, then close the door to check how it lines up. Keep repeating until everything looks right. Have your screwdriver within reach the whole time, since you’ll probably need to make a few minor tweaks before you nail the perfect position.
Check for Uneven Surfaces
Once you’ve adjusted the screws and hinges, run your hand along the cabinet edges to feel for any bumps or rough spots. Uneven surfaces can throw off your door’s alignment, causing it to stick or swing incorrectly. Use your fingertips to carefully check the edges, corners, and frames. Even small imperfections can cause problems. If you find any uneven areas, you might need to sand them down or make more adjustments. Taking time to do this step right means your doors will close flush and stay that way.
Test Door Movement
Open and close each cabinet door slowly to test how it moves. Pull the door toward you, then push it back into place. Notice any resistance, dragging, or spots where it catches. Listen for squeaking or creaking, which usually means the hinges need some oil. The door should swing smoothly without wobbling or shifting out of place. Testing each door helps you spot any remaining issues so you can fix them before calling the job done.
Related Topics: