
Getting a tight seal between your kitchen sink and countertop isn’t as complicated as it sounds. This guide walks you through the whole process so you can handle it yourself with confidence. You’ll learn how to pick the right sealant, prep your surfaces, apply it correctly, and let it cure. Even the best cabinetry service in Palm Beach County, FL, will tell you that a proper sink seal is one of the most overlooked details in kitchen installations. Stick with these steps, and you’ll end up with a watertight finish that lasts for years.
Select the Right Sealant
Picking the right sealant makes all the difference. Go with a silicone-based product designed for kitchens and bathrooms, as it can withstand moisture, heat, and everyday wear and tear. Silicone is flexible, fights off mold and mildew, and goes on smoothly. Look for something labeled “kitchen and bath grade” to ensure it meets the required standards. Pay attention to color too; matching your sink and countertop keeps everything looking clean. The right sealant provides a strong bond that protects against leaks and long-term water damage.
Prepare the Sink and Countertop
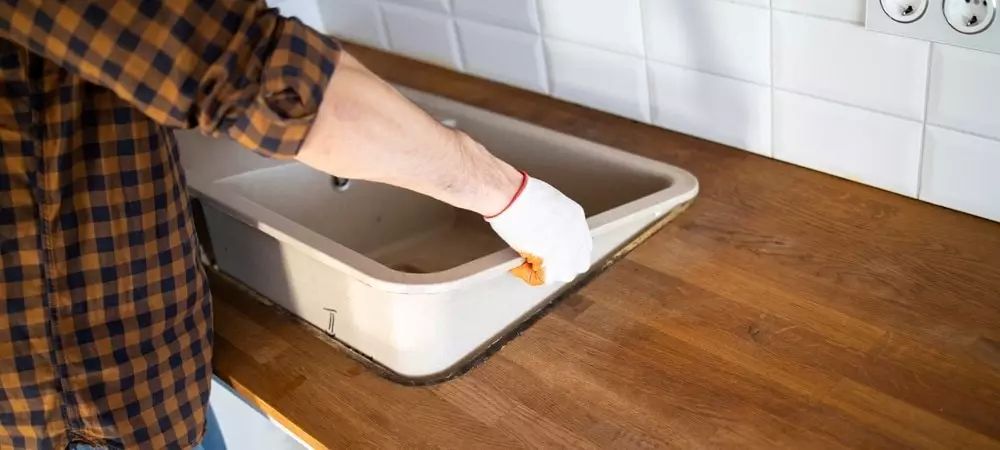
Start by cleaning both surfaces thoroughly so the sealant sticks properly. Grab a non-abrasive cleaner and warm water to wipe away any dirt, grease, or gunk. Clear out all debris from the edges where you’ll be applying the sealant. Dry everything completely with a clean cloth; any remaining moisture will affect how well the sealant bonds. If old caulk or sealant residue is hanging around, scrape it off with the right tool or solvent. A clean surface means your new sealant will grip tight and hold up over time.
Apply the Sealant
Load your caulking gun and start applying sealant along the seam where the sink meets the countertop. Begin at one end and move steadily, keeping even pressure the whole way. Fill in every gap completely so water can’t sneak through later. Work quickly, but stay precise. Too much sealant creates a sloppy look. Make sure the product sticks well to both the sink and countertop materials. Once you’ve gone all the way around, let the sealant sit and cure before moving on to the next step.
Secure the Sink in Place
Set the sink into the countertop cutout and make sure it fits snugly before locking it down. Check that it sits level and lines up with the countertop edges. Once positioning looks good, attach it using clips, brackets, or adhesive, depending on your sink type. Follow the manufacturer’s directions closely so everything stays secure. Don’t crank down the clips or brackets too hard, or you could crack the sink or damage the countertop. A properly secured sink keeps your whole kitchen setup stable and functional.
Allow for Proper Curing Time
Give the sealant enough time to fully set before you use the sink. Curing creates a strong bond between the sink and countertop, keeping water out. Depending on your sealant, this could take anywhere from a few hours to a couple of days. Check the manufacturer’s instructions and follow them exactly. Rushing this part leads to leaks and a weak seal that won’t hold up. A little patience here saves you headaches down the road and gives you a reliable installation that lasts.
Clean Up and Finish Up
Wipe away any extra sealant that squeezed out beyond the sink edges using a clean, dry cloth. Take your time here; attention to detail is what separates a DIY job from a pro-level finish. Let the sealed sink cure completely based on the product instructions. After it’s set, look over the whole area for missed spots or uneven sections and touch up if needed. Clean your tools and workspace with the right cleaner to remove any leftover sealant. Step back and appreciate the work you’ve got, a kitchen sink that looks sharp and won’t leak.
Related Topics: